What is In App Purchases and How Does it Work?
Today we’re going to talk about doing in-app purchases inside of Godot. so first we’re going to go through the process of explaining how in-app purchases operate, we’re going to go ahead, and download our plugin. From there we we will set up our scene and set up our project. We are going to then code our signals and our project itself, and then we’re going to go ahead and set up our application out on the Google Play Store so that we can do internal application testing. We will then download our app and test it and verify our results so that’s what I have in store for you guys today, so let’s go ahead and get started.
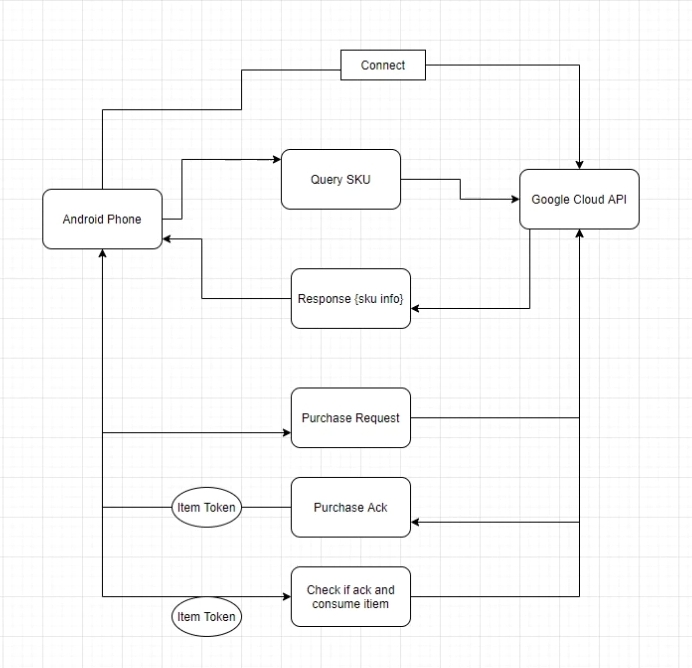
The first thing we need to look at is how the Google API works for IAP. On the right here is a small diagram of how it works. First you have an android phone that goes out sends our connection request to the Google Cloud API, once it’s done it will query the SKU that it’s trying to purchase. Think of a SKU as just the single item that you’re trying to purchase. The Google Cloud API will respond with that SKU information it will contain how much it costs, the items unique id and things like that. When you want to purchase this item you go ahead and click on the button to purchase it. Android is going to send out a request to the Google Cloud API saying “Hey, i’m going to buy this item” Google will send back a purchase acknowledgement successfully purchasing this item and you’ll get this little item token and this item token is basically your item in number form. When the player consumes the item we send the token out to the API saying we will consume it and the API removes this token from there db stopping the user from using it again.
Getting The Plugin
First we will need to download our plugin
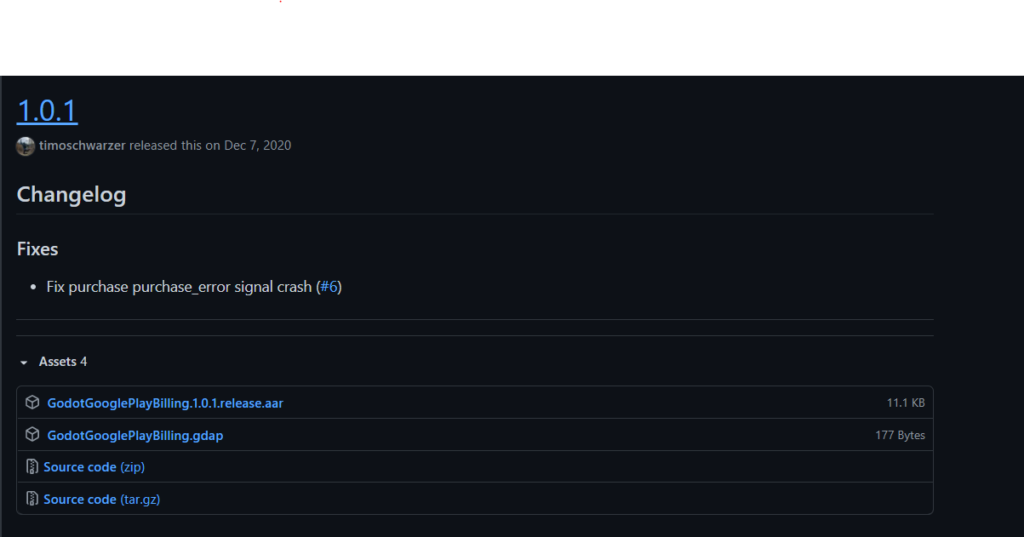
https://github.com/godotengine/godot-google-play-billing/releases
Be sure to pull down both the AAR and the GDAP files.
Setting up Godot
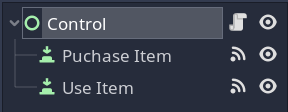
First, lets create our scene we will be doing an interface scene. From here lets create two buttons. Lets set them up to be right above each other. The first button will be our way to purchase the item lets set the text to Purchase Demo Item and we will name it Purchase Item. The second button will be used to use our purchased item lets set the text to Use Demo Item lets name it Use Item.
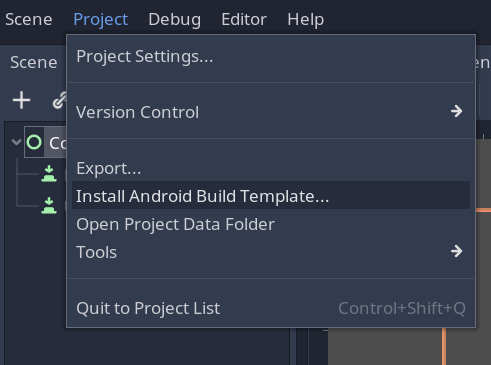
From there we need to open our Project -> Install Android Build Template. This will install the android build template. From here open up your project your file explorer and navigate over to yourproject\android\plugins and paste your billing library to there.
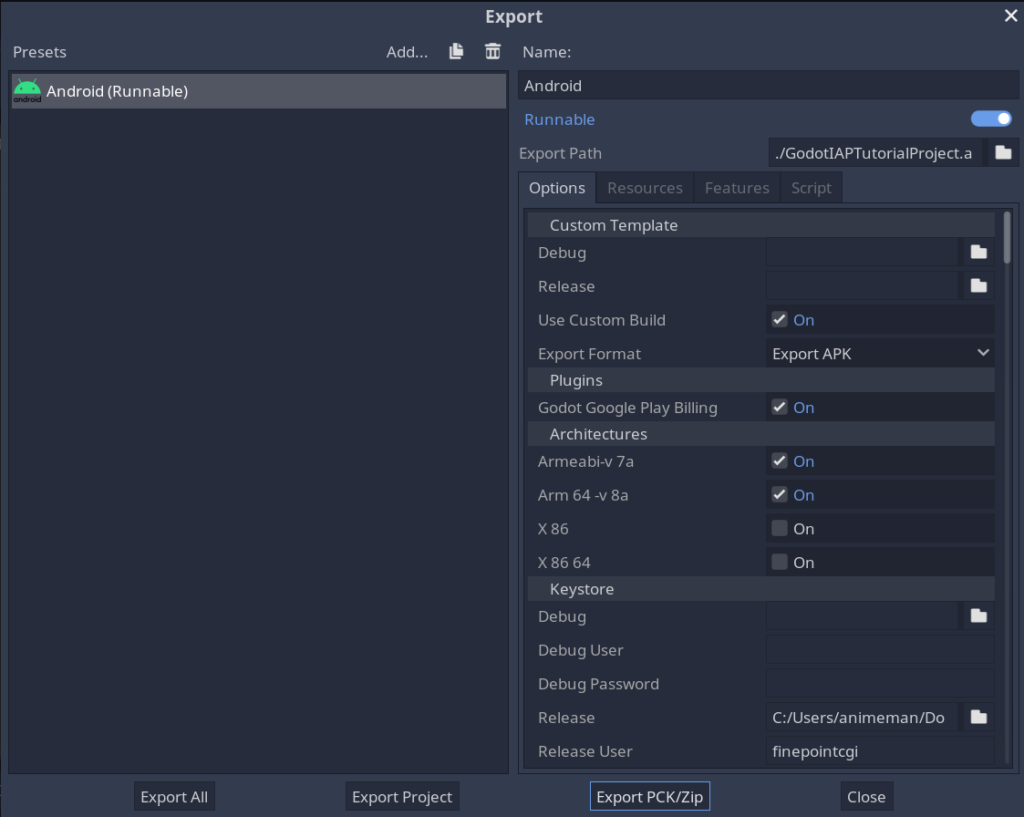
Go back into Godot and navigate to Project -> Export from there Add a preset and click Android. Click on Android and you will see on the right custom build click and enable that. Just under the custom template there is a plugins section. Enable the Godot Google Billing plugin. From here its time to get coding!
Coding The Plugin
Go to your control node and right click -> Attach Script. Lets name it Billing Controller. (I do like my controllers) In our ready function we need to add our signals. We also need to make two varables that can hold our billing singleton and our item token.
var billing
var itemToken

func _ready():
	if Engine.has_singleton("GodotGooglePlayBilling"):
		billing = Engine.get_singleton("GodotGooglePlayBilling")
		billing.connect("connected", self, "connected") # fired when you connect to the google api
		billing.connect("disconnected", self, "disconnected") # fired when you disconnect
		billing.connect("connect_error", self, "connect_error") # fired when you cant connect
		billing.connect("purchases_updated", self, "purchases_updated") # fired when you get your purchases
		billing.connect("purchase_error", self, "purchase_error") # fired when you cant get any purchases
		billing.connect("sku_details_query_completed", self, "sku_details_query_completed") # fired when you get your sku details
		billing.connect("sku_details_query_error", self, "sku_details_query_error") # fired when you cant get you sku details
		billing.connect("purchase_acknowledged", self, "purchase_acknowledged")# fired when you purchase something
		billing.connect("purchase_acknowledgement_error", self, "purchase_acknowledgement_error") # fired when you cant purchase something
		billing.connect("purchase_consumed", self, "purchase_consumed") #fired when you use an item
		billing.connect("purchase_consumption_error", self, "purchase_consumption_error") # fired when you cant consume something
		billing.startConnection()
	pass # Replace with function body.
From there we need to set up our connected function that our connected signal attaches to. The connected function will go out and query the SKU details. it takes in a list of strings in this case im going to put “testsku in our list of queried skus so we can get that from the Google API. The second option is used to determine if its a subscription or a in app purchase. We will be using inapp but if you want to use subscriptions you can use subs We also need to build out query completed function. In this case I don’t want to use anything that comes back but I will print it out for debugging.
func connected():
	billing.querySkuDetails(["testsku"], "inapp")

func sku_details_query_completed(details):
	print(details)
From there lets go ahead and finish setting up our buttons. Going out to our scene we need to connect our button signals. Click on the “Purchase Item” button on the right there is a button by the inspector that says “Node” click on that, Right click button_down() -> connect, click on your control node that has your BillingController script on it and click connect. this will open up your script add the following code to your function.
func _on_Puchase_Item_button_down():
	var response = billing.purchase("testsku")
	print("purchase has been attempted : result " + response.status)
	if response.status != OK:
		print("error purchasing item")
	pass # Replace with function body.
What this code does is it goes out and attempts to purchase the item using “testsku” as the item id you are purchasing. I log our response so I can debug any issues. From there I check if the status is ok if not I log the error so I can debug it. We also need to connect our signal for purchases updated. This signal is fired off when the user wants to purchase a item and the API acknowledged that they purchased the item. It should contain all the items a user has purchased. In this we loop though and check if they are acknowledged. Acknowledging a purchase is important so Google does not author another code for this item it will help fight fraud. We then need to check if the items we got back has anything and we pull our item token. YOU MUST HAVE YOUR ITEM TOKEN TO USE THAT ITEM. This is a unique code for each items use. I pull the last one on the list because it is the current one they just purchased.
func purchases_updated(items):
	for item in items:
		if !item.is_acknowledged:
			print("acknowledge Purchases: " + item.purchase_token)
			billing.acknowledgePurchase(item.purchase_token)
	if items.size() > 0:
		itemToken = items[items.size() - 1].purchase_token
Now we must hook up our acknowledge signel. This can be used to store there tokens in a db or something of that nature. Once its acknowledged it can be used.
func purchase_acknowledged(token):
	print("purchase was acknowledged! " + token)
Now, go back out to our scene. Click on the “Use Item” button on the right there is a button by the inspector that says “Node” click on that, Right click button_down() -> connect, click on your control node that has your BillingController script on it and click connect. this will open up your script add the following code to your function.
func _on_Use_Item_button_down():
	if itemToken == null:
		print("Error you need to buy this first")
	else:
		print("consuming item")
		billing.consumePurchase(itemToken)
	pass # Replace with function body.
This will send the token out to the API and tell it we are consuming this item and to remove it from the users account. We must check if its null first we dont want to crash out Googles api by sending a null item to them. from there we go ahead and use our item. Finally we connect our signal for consuming this item. This is used to give the users its affect eg the power up or more lives in my case ill just log that it was consumed.
func purchase_acknowledged(token):
	print("purchase was acknowledged! " + token)
Final Code
With this it should work! Here’s the final code!
extends Control


# Declare member variables here. Examples:
# var a = 2
# var b = "text"
var billing
var itemToken

# Called when the node enters the scene tree for the first time.
func _ready():
	if Engine.has_singleton("GodotGooglePlayBilling"):
		billing = Engine.get_singleton("GodotGooglePlayBilling")
		billing.connect("connected", self, "connected") # fired when you connect to the google api
		billing.connect("disconnected", self, "disconnected") # fired when you disconnect
		billing.connect("connect_error", self, "connect_error") # fired when you cant connect
		billing.connect("purchases_updated", self, "purchases_updated") # fired when you get your purchases
		billing.connect("purchase_error", self, "purchase_error") # fired when you cant get any purchases
		billing.connect("sku_details_query_completed", self, "sku_details_query_completed") # fired when you get your sku details
		billing.connect("sku_details_query_error", self, "sku_details_query_error") # fired when you cant get you sku details
		billing.connect("purchase_acknowledged", self, "purchase_acknowledged")# fired when you purchase something
		billing.connect("purchase_acknowledgement_error", self, "purchase_acknowledgement_error") # fired when you cant purchase something
		billing.connect("purchase_consumed", self, "purchase_consumed") #fired when you use an item
		billing.connect("purchase_consumption_error", self, "purchase_consumption_error") # fired when you cant consume something
		billing.startConnection()
	pass # Replace with function body.

func connected():
	billing.querySkuDetails(["testsku"], "inapp")
# Called every frame. 'delta' is the elapsed time since the previous frame.
#func _process(delta):
#	pass
func sku_details_query_completed(details):
	print(details)

func purchases_updated(items):
	for item in items:
		if !item.is_acknowledged:
			print("acknowledge Purchases: " + item.purchase_token)
			billing.acknowledgePurchase(item.purchase_token)
	if items.size() > 0:
		itemToken = items[items.size() - 1].purchase_token

func purchase_acknowledged(token):
	print("purchase was acknowledged! " + token)

func purchase_consumed(token):
	print("item was consumed " + token)

func _on_Puchase_Item_button_down():
	var response = billing.purchase("testsku")
	print("purchase has been attempted : result " + response.status)
	if response.status != OK:
		print("error purchasing item")
	pass # Replace with function body.


func _on_Use_Item_button_down():
	if itemToken == null:
		print("Error you need to buy this first")
	else:
		print("consuming item")
		billing.consumePurchase(itemToken)
	pass # Replace with function body.
Exporting Your App
Creating Our Release Key
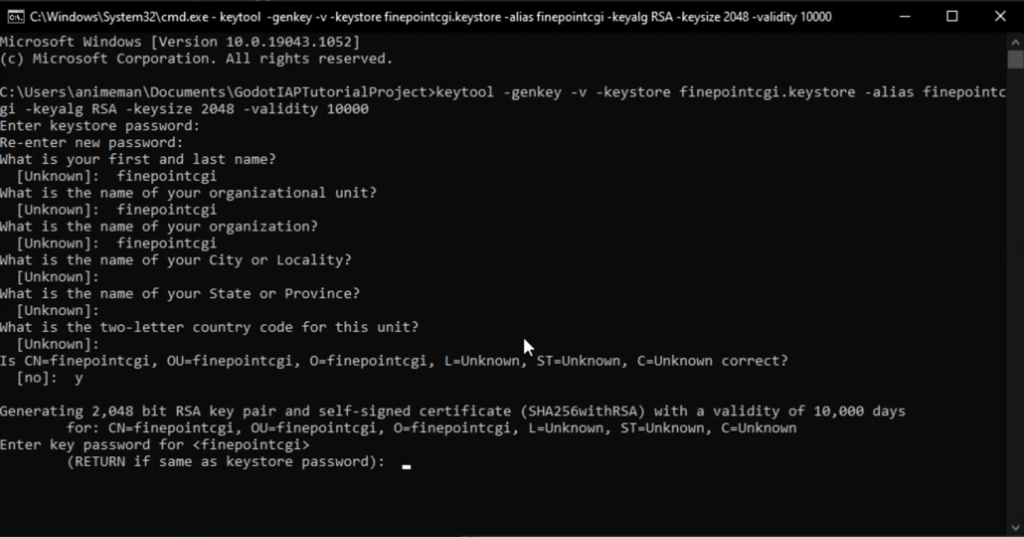
From here we need to export our app and put it out for internal testing. To upload to Google Console we first need to build our release key. Open a command prompt and navigate to your project. From here generate your release key: keytool -v -genkey -keystore mygame.keystore -alias mygame -keyalg RSA -validity 10000 . This will tell Androids keytool that you want to generate a release key. It will prompt you for a few things.
First your password THIS IS IMPORTANT do NOT forget your password make it something secure and something you will not lose.
Then you will need to reenter the password.
From there your going to be asked your first and last name in this case ill use finepointcgi.
It’ll ask for your organizational unit ill put finepointcgi.
It will ask for your organization ill put finepointcgi.
It’ll ask for you city state and country code.
Finally it will ask if everything is correct im going to say y for yes.
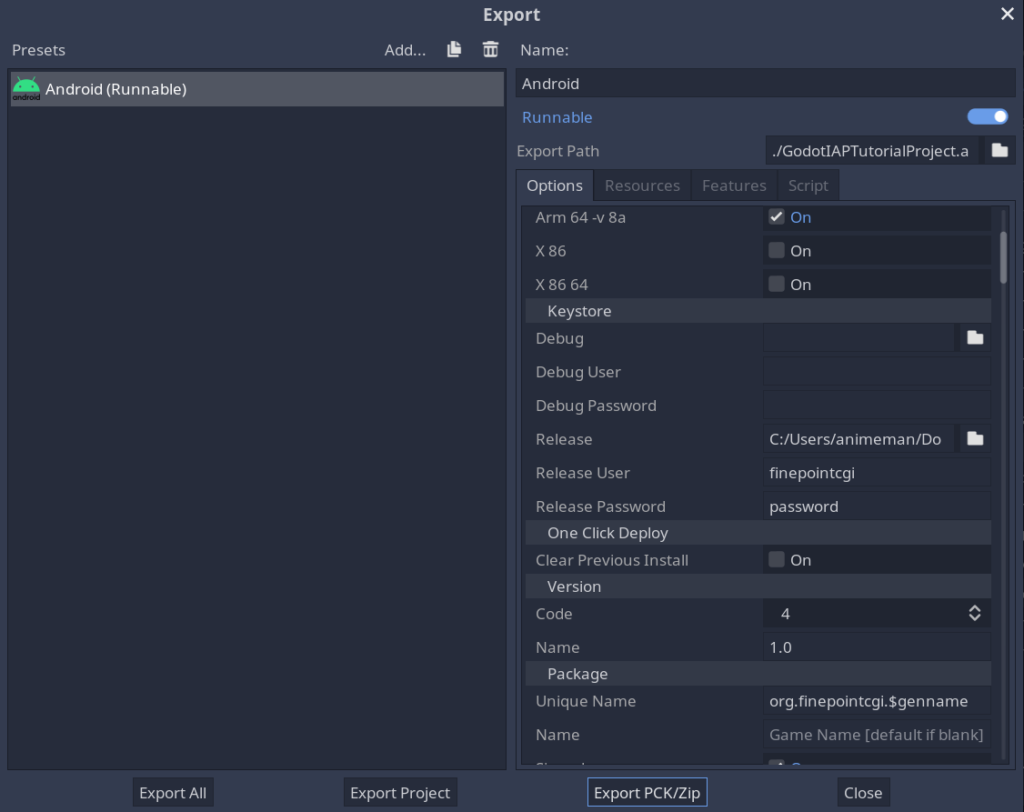
Now you have your release key! Open up Godot and go to Project -> Export. Scroll down the options until you see keystore. Click on the file icon for release and navigate to your release key you just generated. For release user use your alias you used as you generated your key. For password it is the password you picked in my case it is password.
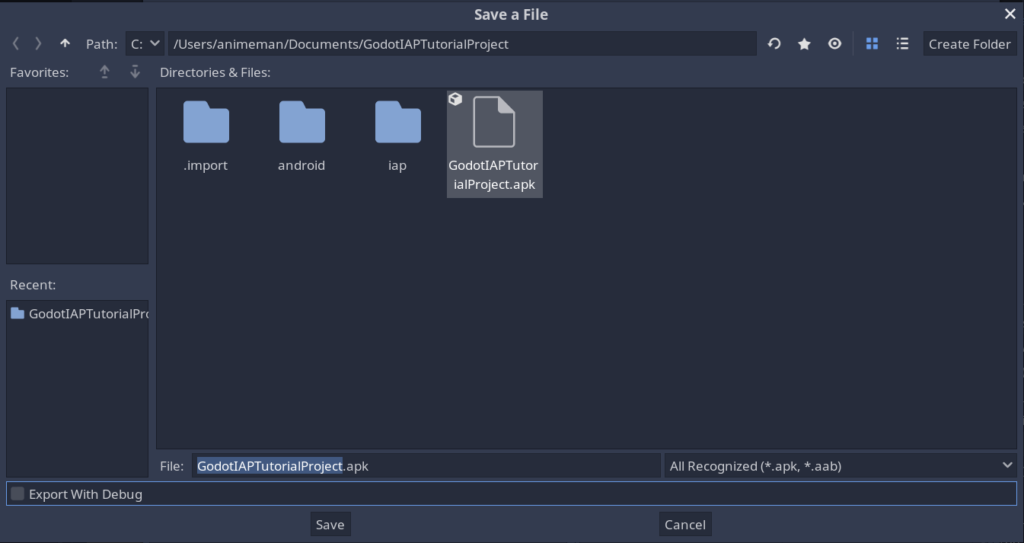
Now it time to export! Click on export project and be sure to uncheck export with debug. Let Godot do its thing and at this point you should be the proud owner of a new APK file! From here we need to upload it to our Google Console and put it up on the play store. The reason is Googles API need a special key to allow you to interface with there system.
Google Console
Creating Our App

Open up your Google Console by going to https://play.google.com/console/u/0/developers if you dont have an account then go ahead and make one!
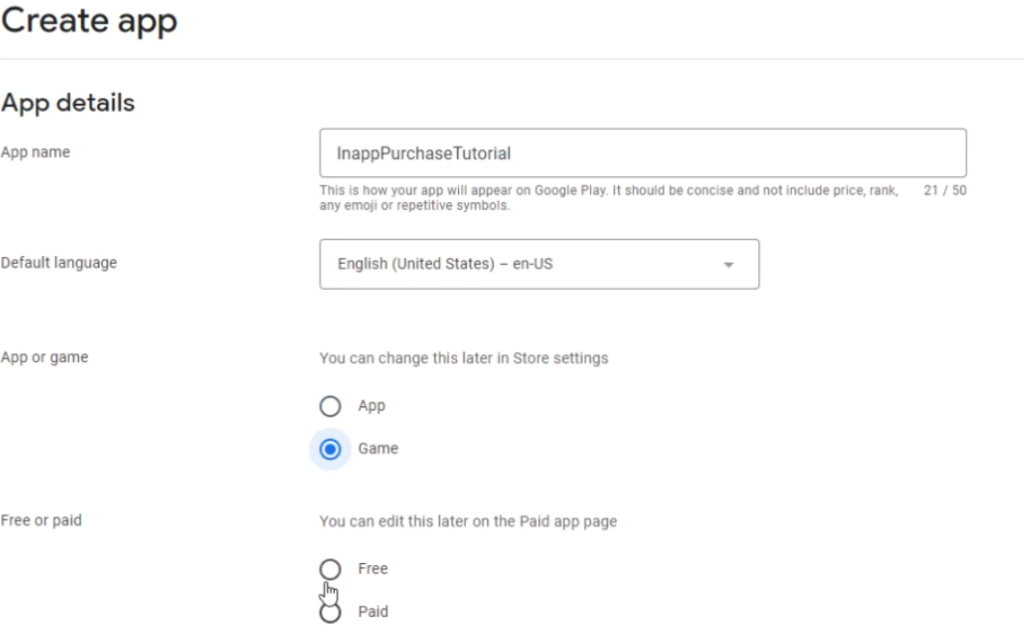
From here we need to create our google app, go ahead and click on create app in the upper right corner.
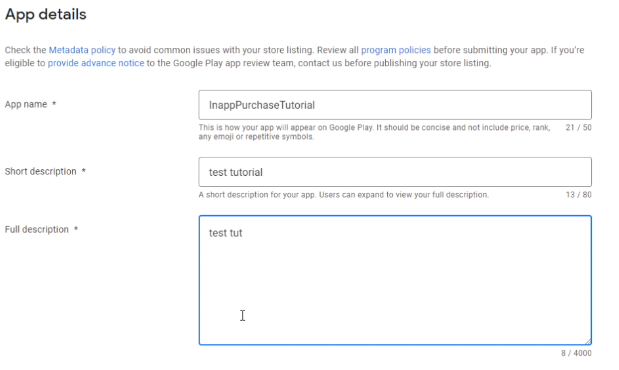
Next fill our our name and run though the prompts for us app name is InAppPurchaseTutorial. Our language is English, our app is a game its free and yes we agree to the two check boxes. Next click on create app.
Setting Up Our Testing Track
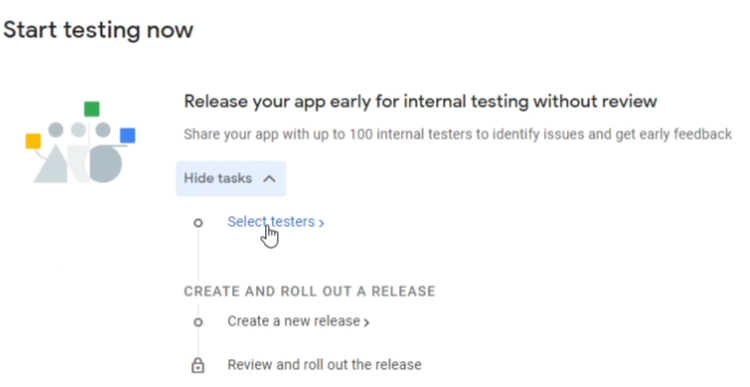
From here we are taken to our dashboard for that app! Scroll down to start testing now click on select testers. This where we will select our testers now in my case I have a group of testers I already set up. If you do not then you can create one by clicking on create email list. Click save changes on the bottom right
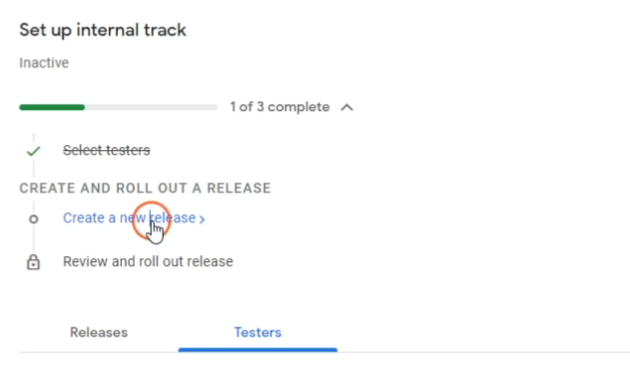
Once its done saving you’ll notice a few more options. We are going to click on create a new release. This will allow us to create a release for our internal testing so it will not be out on the main store.
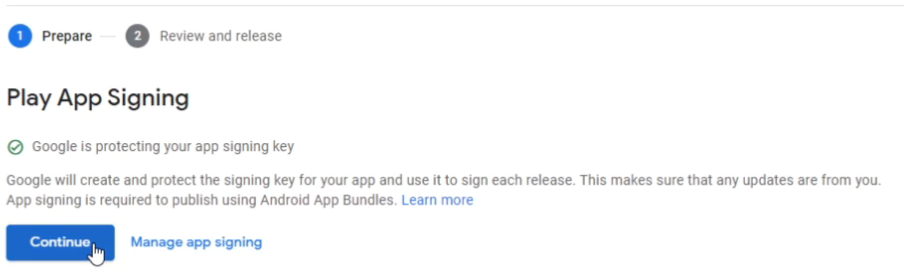
From here we want google to sign our app for Google Play this allows Google to sign your app for you so if you want to use AAB files you have to click continue. From here you can see it is looking for a APK or an AAB. Lets go out to our exported apk and drag it into the app.
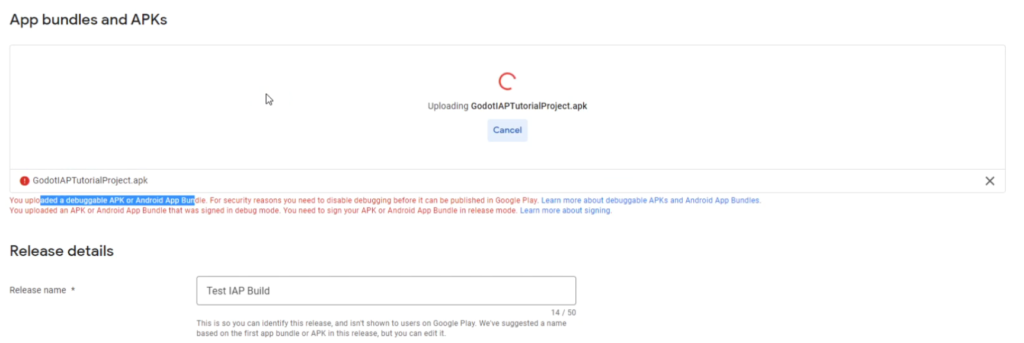
In my case I uploaded a debug APK by accident in the video of the tutorial. This will not work you must have a release key attached to your export. Once it is uploaded you can go ahead and click the review release button.

From here click Start rollout to Internal Testing. It will take you to your release section. Go ahead and click on dashboard to take you back to your main screen. Scroll down until you find Set up your app.
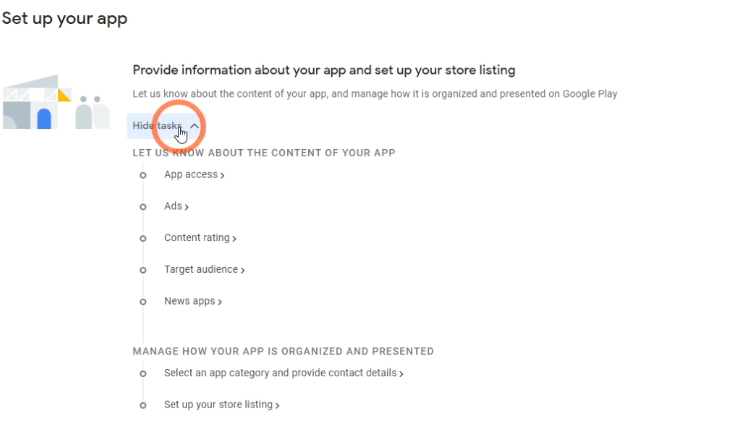
Lets run though this quickly App access is asking if you need any special access to use this app. In our case no we do not Ads is asking if your app contains ads also in this case no we do not have ads. Content rating wants you to fill out your email address what category it is and what your content rating is so run though it for the most part all the answers but in app purchases is a no.
Target audience is what audience is being targeted with your app. In our case we are going to say 13-15 16-17 and 18 and over. For store presence we will say no its not targeted to children.
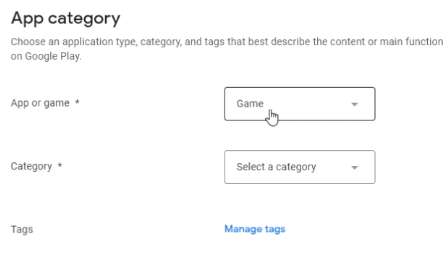
Setting your store settings and app category. For me I chose game and simulation. Fill our your email and website/phone number and click Save. Go back to the dashboard and click set up your store listing.
Next Setup your app details. Scroll down and put in your app icons. If you dont have any I have a few small templates you can use at :
https://drive.google.com/drive/folders/1KrOs1zLYMYT5dl_V8ktz3xUQpRlE5AwT?usp=sharing
Creating Your In App Purchase
Scroll down to the monetize section and click on
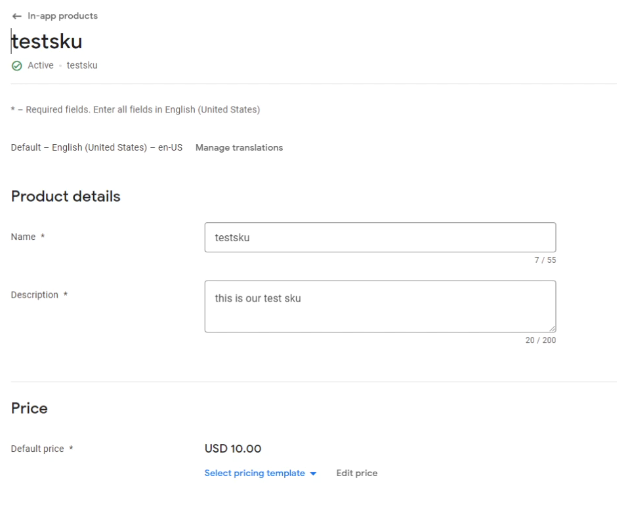
Products -> In-app Products.
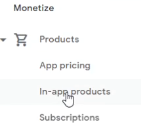
From here set your product details name in my case I’m going to use testsku. This is the same name as the item I’m querying in code using billing.querySkuDetails([“testsku”], “inapp”) . For description I’m using this is our test sku and finally price I’m setting it at a huge 10 dollars! Go ahead and click save changes!
Downloading Your App From Google Play
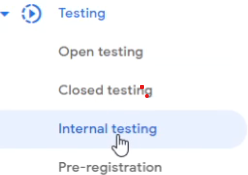
OK if you’ve made it this far congrats you have been though a lot! Go to the left pane and click on Testing -> Internal Testing and lets go ahead and download this thing!
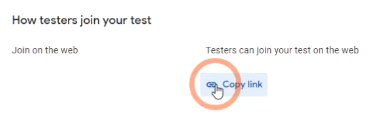
Click on testers and click on copy link.
From here paste that in a new tab in your browser and you will be greeted with:
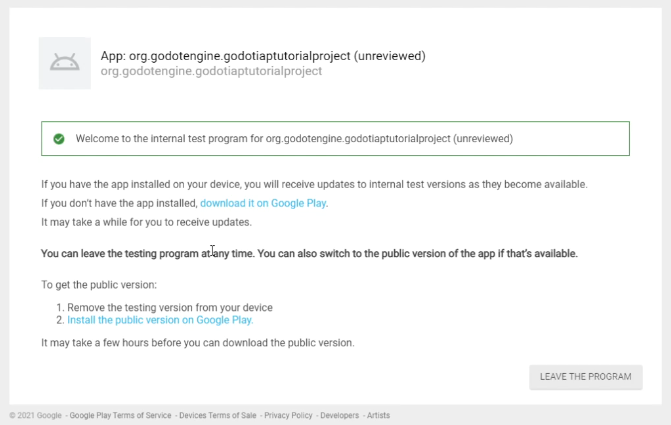
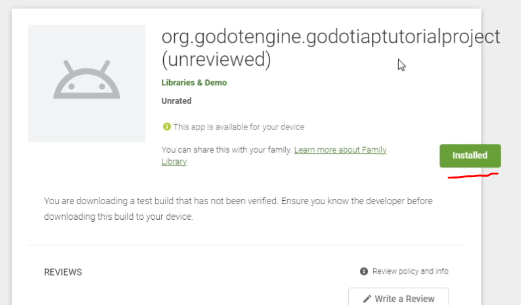
Go ahead and join the program then click on the “download it on Google Play” link. Click on install and select your device. Google will ask you to login so go ahead and log in.
Using The App
From here we can now open our app. I suggest we connect our phone to our computer and open up a command prompt and type adb logcat. You do not have to do this but it will allow you to have your logs you created earlier in the tutorial!
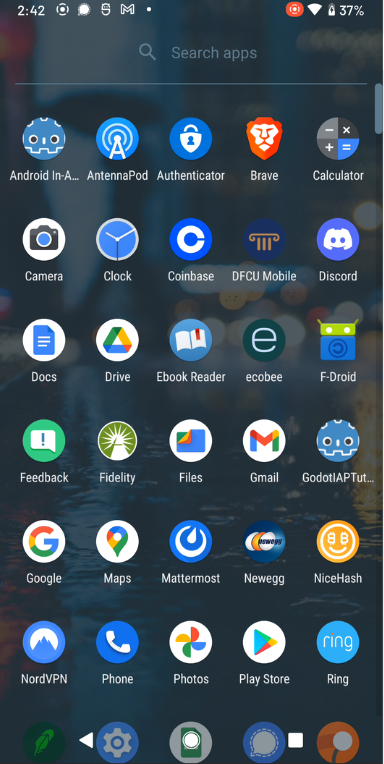
Now we can click on our icon! Go ahead and click on our icon and click on the purchase item if everything was set up correctly you should now have a small popup asking you to purchase your item.
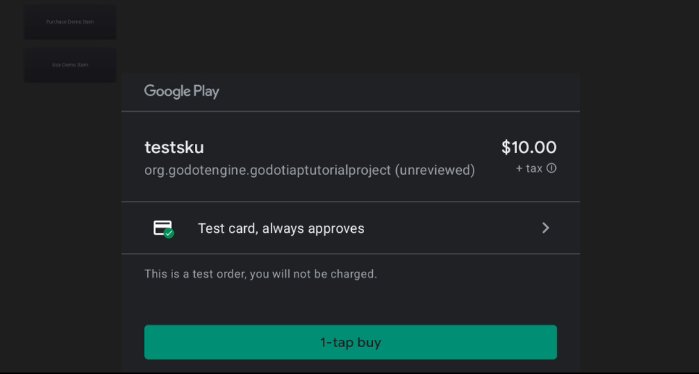
Go ahead and purchase your item! Now click consume and you will see it seems to do nothing but if we check out logs it says :

This means we successfully consumed and used our item!
Conclusion
Well that’s all there is to it if you have any questions throw them in the comments below because this is a very complicated system. I don’t want you guys to get completely lost, so go ahead and just throw a comment below if you have questions, I’m more than happy to sit down and help you guys out. If you have any suggestions or anything that you guys want me to cover in the future also throw that in the comments below because this was a viewer suggested tutorial and I take your suggestions very seriously and ill make tutorials of things you want to see, but that’s all I have for you today, so thank you very much for watching. I mean reading, and ill see you next time.
Thanks


Great to see a `text` version of your Youtube tutorials.
It saves me pausing the video to catch up.
Btw keep up the good work
Thank you for putting this write-up and related video together — very helpful for the community.
Is 1.0.1 still the best version of the plugin to use for a new project under Godot 3.5.2? Or would your 1.1.2 release (https://github.com/finepointcgi/godot-google-play-billing/releases/tag/1.1.2) be the better option?
I woud use my release if you can