Hey Guys! This is Mitch from FinePointCGI.
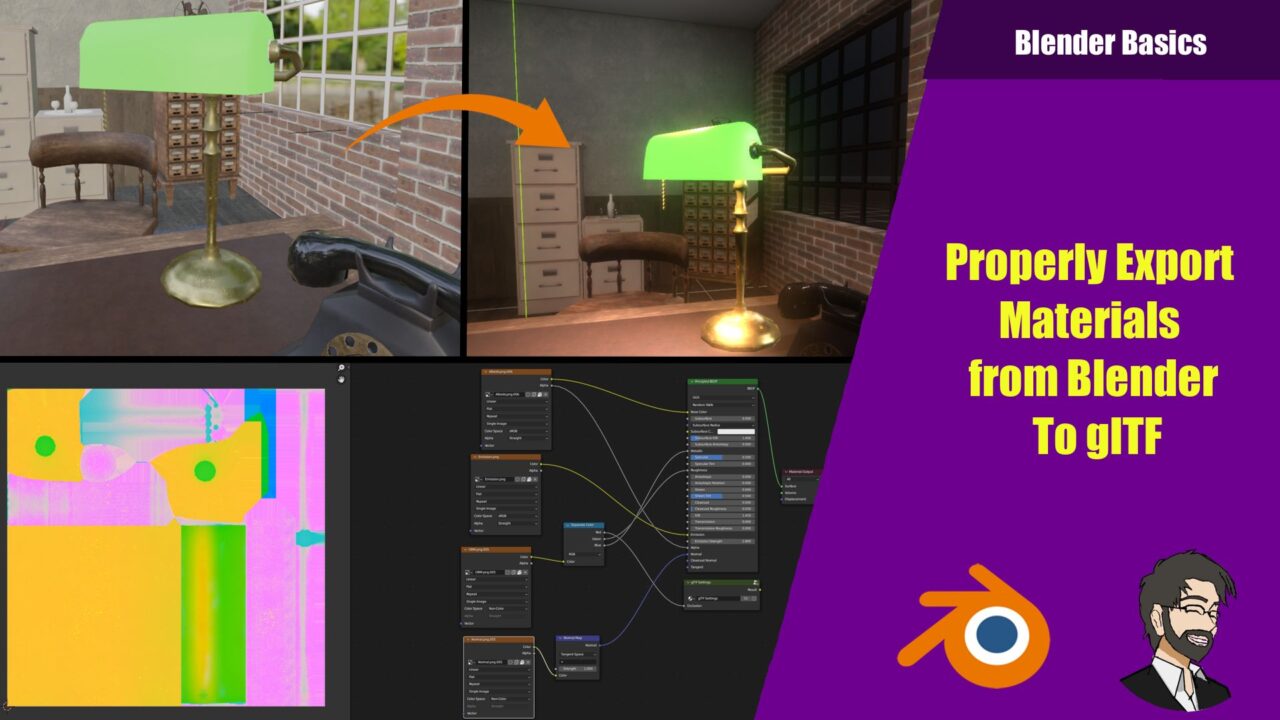
In today’s post, we’re diving into one of the optimal ways to set up and export your assets materials from Blender to your preferred game engine. We’ll cover different channels, some common settings for GLTF, and ponder on the efficiency of using GLTF. Let’s dive right in!
Setting Up Textures
First, you need to set up your textures. We can begin by diving into our shading. You might notice two objects present. This is because I will demonstrate two different techniques that can be highly beneficial.
You’ll observe that the first object already has parameters in place. Here’s a quick run-through of how each texture gets integrated into your material for a GLTF export:
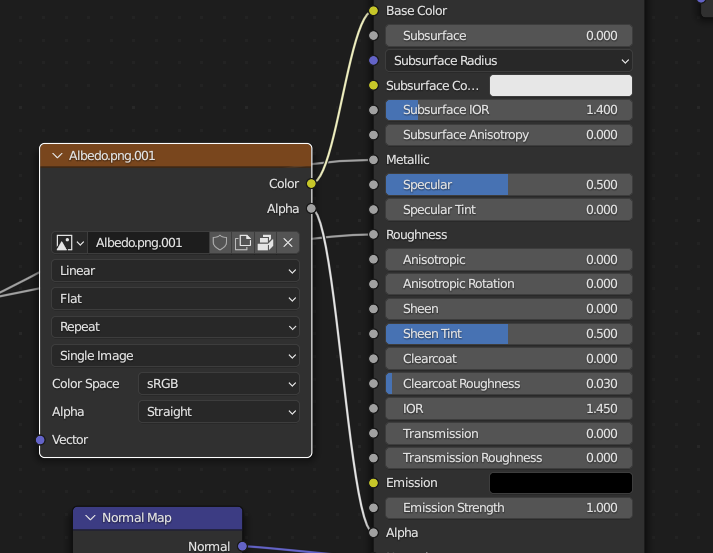
ALbedo/Alpha
Albedo is essentially our color map, which you can drag into your base color.
Alpha: If you have any alpha, you’ll want to put it in your alpha section. If you want Alpha cutout to work in your game engine, navigate to your material, then go into the blend mode and change it to Alpha clip. Remember, how you set it up here is how it will appear when
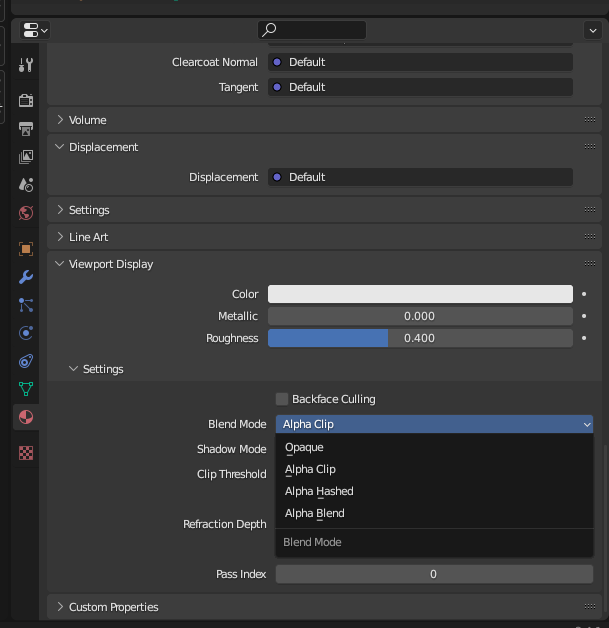
ALPHA REQURES SOME SETTINGS CHANGES
In your material panel there is a blend mode under viewport display -> settings -> Blend Mode. This will effect how the engine will display your maps
- Opaque: This is the default setting. The material is fully visible and does not allow any transparency. In other words, this mode disregards any alpha information present in the material, treating it as entirely opaque.
- Alpha Clip: This mode is also known as “Alpha Test” or “Cutout”. It uses the alpha channel to create a clear, binary distinction between fully opaque and fully transparent areas. It’s ideal for objects with sharply defined transparency, like fences, tree leaves, or paper cutouts, where you don’t need semi-transparency.
- Alpha Hashed: This mode allows for semi-transparent materials and can give better results when layering transparent objects. It uses a dithered pattern to simulate transparency, which can result in a noisy texture but generally provides better sorting of transparent surfaces compared to Alpha Blend.
- Alpha Blend: This mode allows for full semi-transparent materials and is ideal for materials like glass or liquids. It blends the alpha channel with the color channels to give an accurate representation of transparency. However, this mode might face issues with depth sorting, especially when multiple transparent objects overlap.
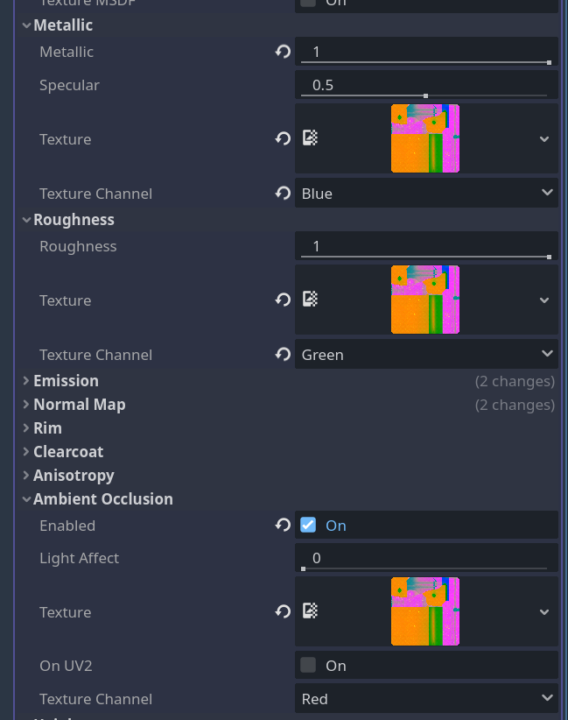
Metallic And Roughness
Based Rendering (PBR) workflow that helps simulate realistic materials in 3D modeling and game engines.
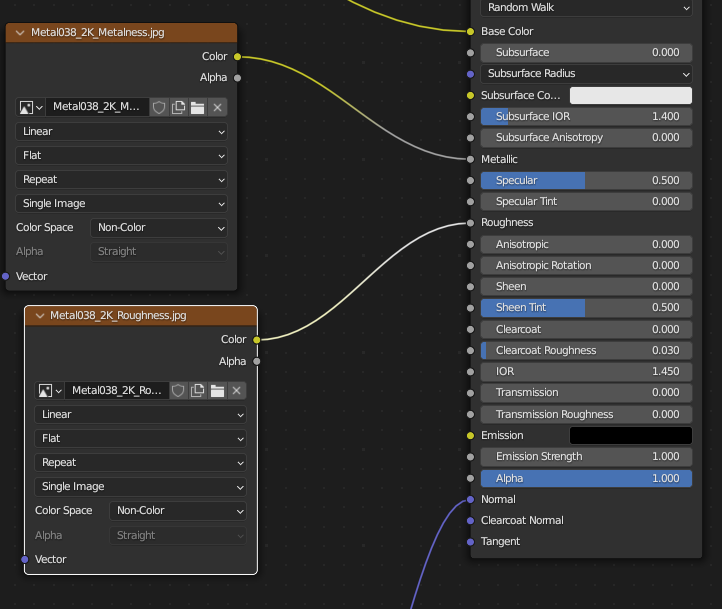
Metallic Maps: These maps dictate which parts of your model are metallic and which are not. In this grayscale texture, white values (1.0) represent a metallic surface, while black values (0.0) represent a non-metallic surface. It’s important to note that this often represents a binary choice – a material is either metallic or it’s not – so this map often has only pure black or pure white values, with gray values rarely used.
Roughness Maps: These maps control the microsurface detail of your material, determining how rough or smooth it appears. In this grayscale texture, white values indicate a rough surface that scatters light in multiple directions, giving a diffused or matte appearance. Black values represent a smooth surface that reflects light in a more focused direction, giving a shiny or glossy look.
So thats cool how do we export them?
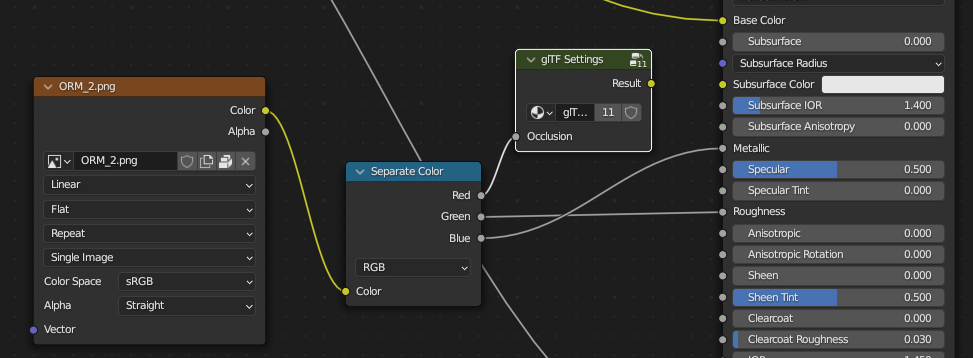
These can go into their respective parameters. I usually separate my ORM (ambient occlusion, roughness, metallic) Texture into the blue and green channel. This is a great way to pack your textures to make them more efficient.
IF ITS NOT PACKED ALL YOU NEED TO DO IS CONNECT YOUR MAPS DIRECTLY AND IT WILL WORK FINE.
Something about when you have multiple maps, if you have multiple maps connected to your metallic roughness and AO it will get combined to a SINGLE ORM texture.
Also, be sure to set roughness, metallic, and normal map to non-color data so the color space is correct and the data transfers correctly.
Also, remember that if you make changes to your textures, it will export with those changes.
Handling Ambient Occlusion
Ambient occlusion is of the the most painful elements for many when exporting from Blender.
The simplest solution is grab your texture node and duplicate it with SHIFT D.
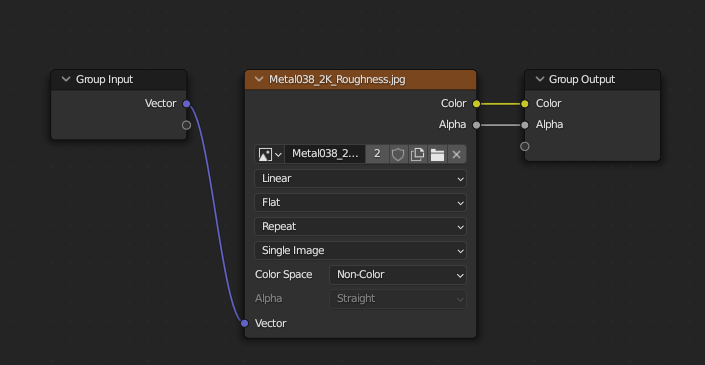
Then group it with CTRL G this will create a group with your duplicated texture in the middle.
Delete the map in the middle
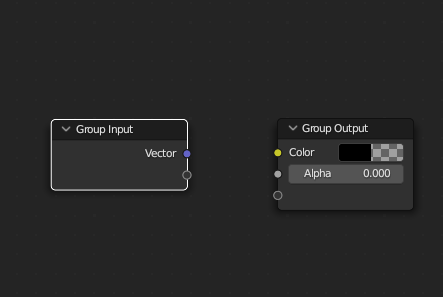
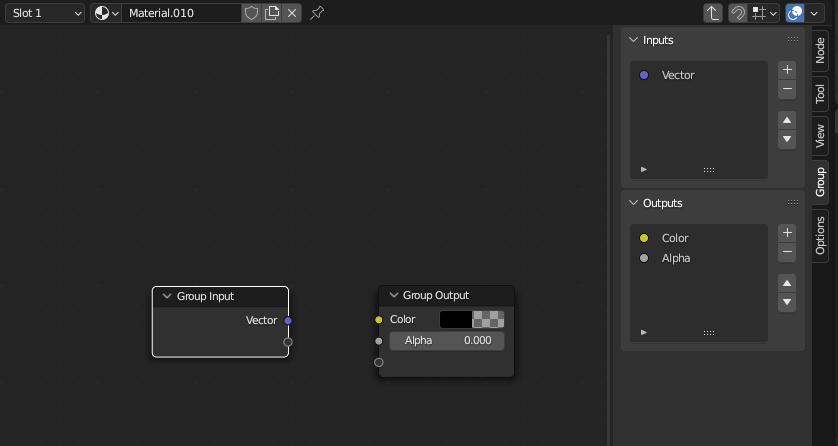
Over on the right there is a inputs and outputs under the group tab
Remove the outputs as they are not needed
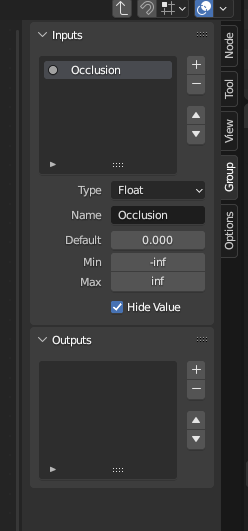
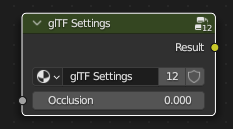
Under inputs change the name of Vector to Occlusion and change its type to float
Hit Tab And you will be greeted with a grouped node
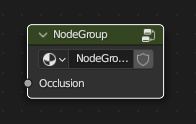
Now rename it to “glTF Settings” exactly as that. Any discrepancies in this could prevent it from working.
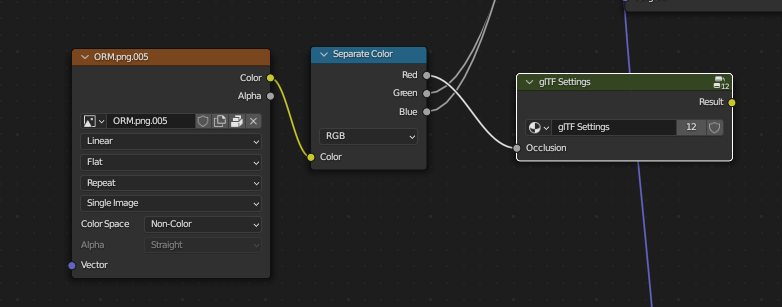
And now connect our occlusion map to our glTF Settings group node.
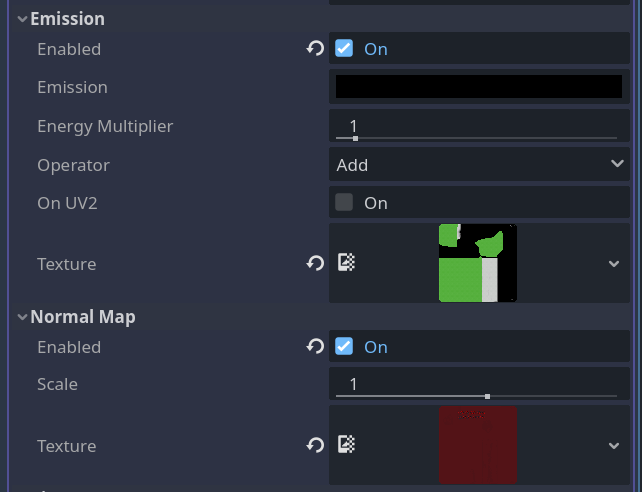
Exporting Normal Map
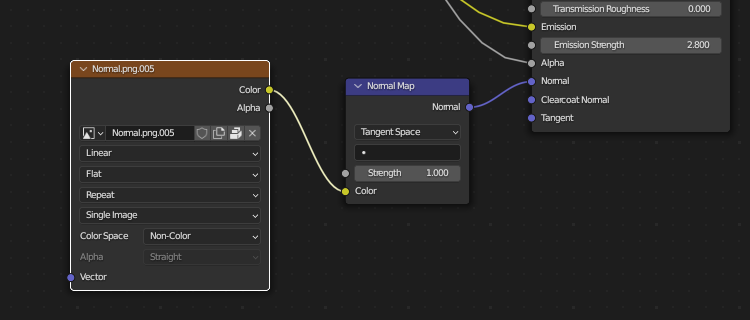
A normal map is a type of texture map that is used in 3D modeling to simulate small surface details, such as bumps or ridges, without the need to include additional polygons in the model.
The normal map is simple be sure to set it to non-color connect it to your normal map node then connect that to normal. This is the simplest way to export it out
A Few More Settings
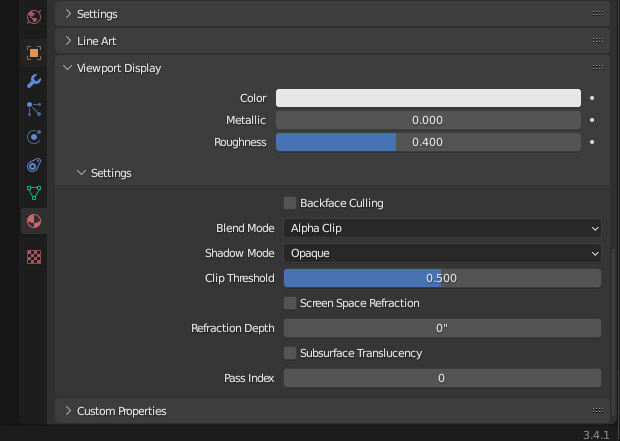
In the settings area, there is a ‘back face culling’ option. If you enable it, it will be turned on in your game engine.
When backface culling is enabled, the graphics engine checks the orientation of each polygon. If it’s facing towards the camera, it gets rendered as usual. However, if it’s facing away from the camera, the engine skips rendering it altogether. This can result in substantial performance benefits, as it significantly reduces the number of polygons that the graphics engine needs to process.
However, for this technique to work effectively, the model should be properly “closed”, meaning there should be no holes in the model where you can see through to the backfaces of other polygons. If a model is not properly closed and backface culling is enabled, parts of the model might appear to be missing when viewed from certain angles.
It’s worth noting that backface culling is usually not recommended for objects with thin, flat surfaces (like paper or leaves) or any transparent or semi-transparent materials where both sides of a polygon could be visible.
After this is setup, you can export your object by going to File > Export > GLTF.
Exporting GLTF: What to Keep in Mind
When exporting GLTF, several options matter:
Now, let’s discuss in detail the export settings when exporting your 3D models as GLTF:
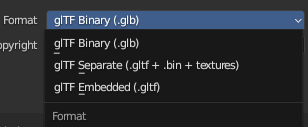
Format: The binary GLB format is the most streamlined as it contains the 3D model, materials, and textures in one file. However, the GLTF + BIN + textures and GLTF embedded formats give you more control as they separate the different components.
GLTF + Bin + Textures is useful if you want to share textures with other objects.
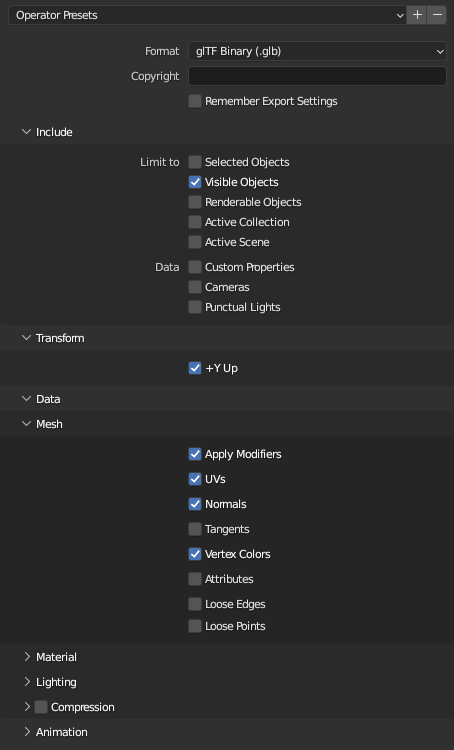
- Include: In this section, you can choose which parts of your Blender file to export. “Selected Objects” exports only the models you have currently selected. “Active Collection” exports all objects in the currently active collection.
- Transform: If you’re facing issues with the orientation of your model in the game engine, you can change the “Up” and “Forward” axes. Keep in mind that different game engines may have different default orientations.
- Material Export: You’ll want to ensure this is turned on.
- Images: You can choose a specific format.
- Geometry: This section includes export options related to the model’s geometry.
- If your model uses vertex colors, make sure to enable or disable if you dont need it “Vertex Colors”.
- The “Apply Modifiers” option applies all modifiers to your model before exporting.
- Animation: This section allows you to export animations. You can export normal animations, shape keys, and skinning animations, which you can control in your game engine.
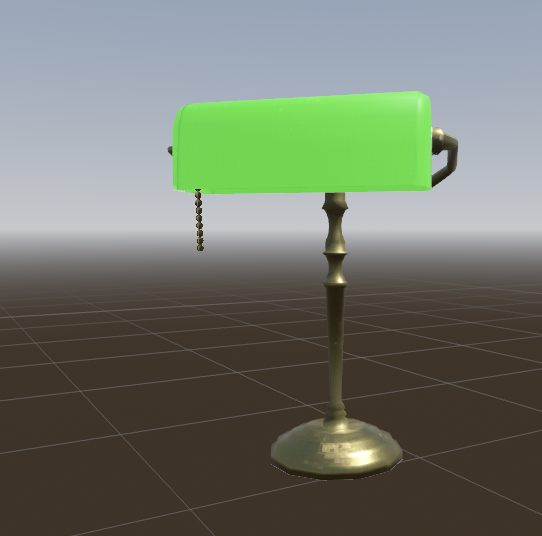
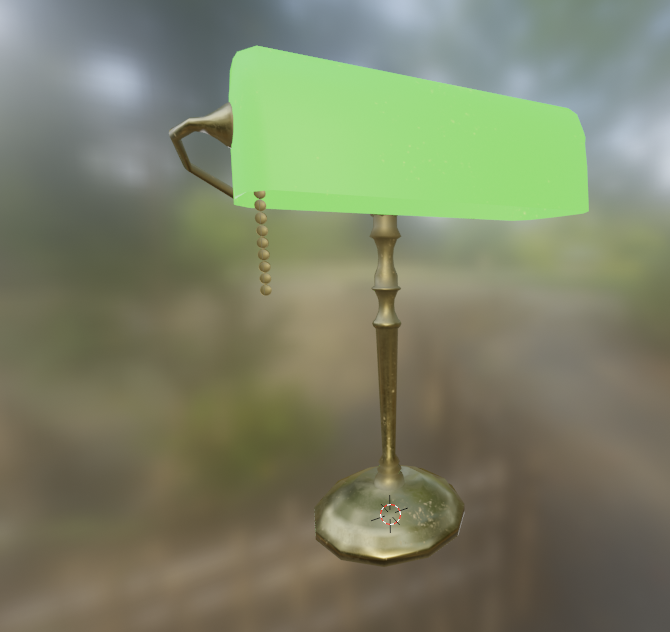
Importing to Godot
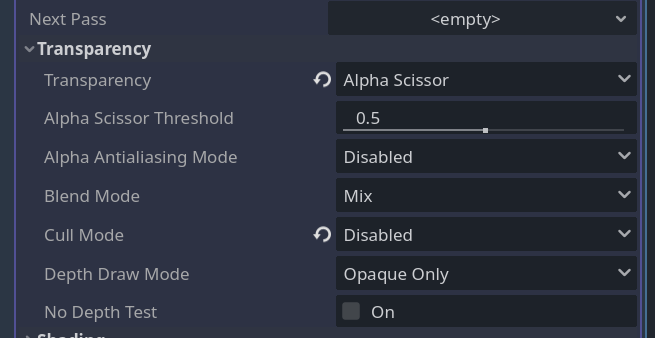
Once exported, you can open your game engine (in this case, Godot) and import your file. Ensure that the GLTF embedded images are set to extract textures. Your export should come across pretty well.
In my case I added in alpha clip and it came out as alpha scissor
I also set my cull mode to disabled
You will also see your maps came across properly as well!
Something you may notice though our maps look really odd its full of funky colors!
This is called an ORM texture that means it packed in the different maps into the different channels of the texture making it 3x more efficent!
You will also see emission come across and normal map as well!
Conclusion
By following these steps, you can efficiently export your assets from Blender into your game engine. If you found this article helpful, please let me know in the comments! Also, feel free to drop any suggestions for future tutorials, or join my Discord (link in the description) for further help. Thanks for reading!
Blender
Godot!