Installing Unreal Engine
First we need to install Unreal Engine so lets head out to epic games website https://www.epicgames.com/site/en-US/home and click on get epic games. This will pull down the launcher. Run though the setup and install the epic games launcher.
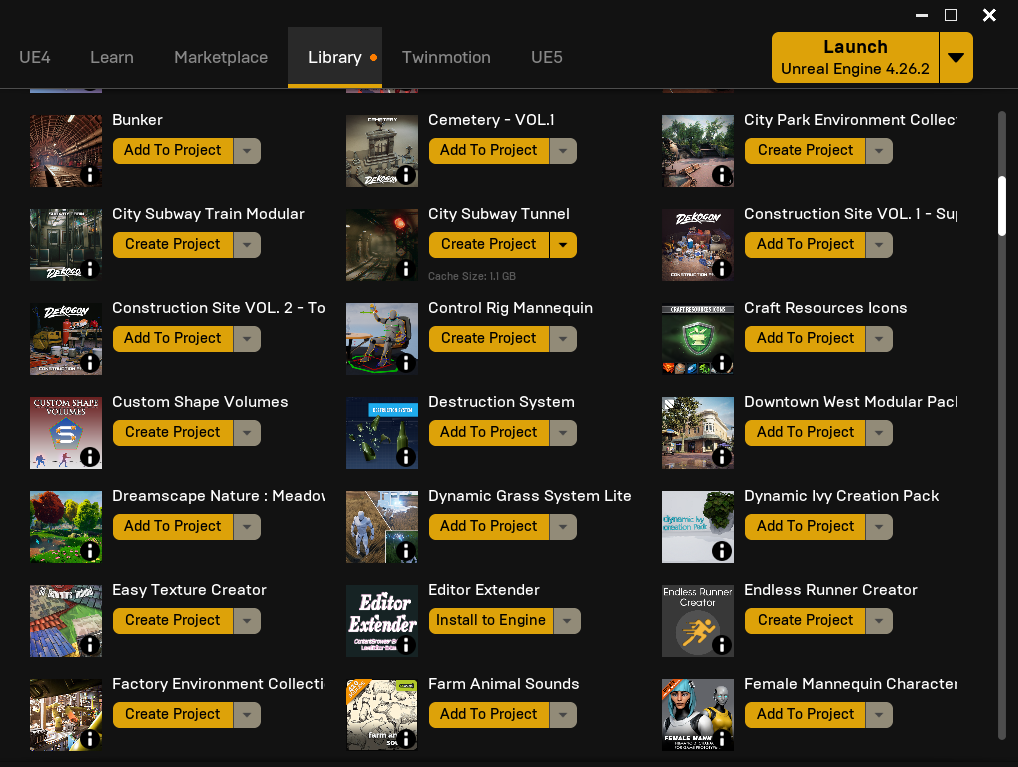
Once we have the epic games launcher go ahead and open it. It will prompt you to sign in or create an account (which you should Epic Games gives you free games every week anyway). From here it should open up on the left you have the main menu lets click on “Unreal Engine”.

Click on “Library” click on + and it finally click on “install”. This will take a long time. Once this is installed lets look at the marketplace, in the terms and conditions of the Unreal Market place you cannot use official Unreal Engine content for commercial purposes OUTSIDE of the Unreal Game Engine.
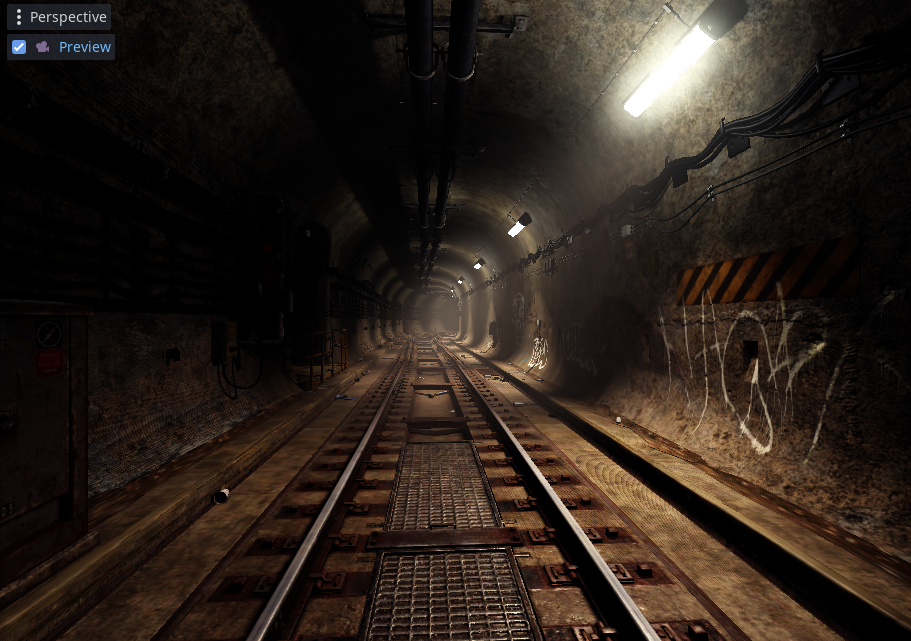
So we will not pick that. I will go ahead and pick a subway environment that I got for free a while back from Epic Games. (did I mention they give away free content every month)
Now that we have our project we will go ahead and go to our library. Here we can see our assets we have available to us to use. Lets pick our subway and click create project. This will download the assets and create the project.
This will open Unreal Engine!
Exporting From Unreal

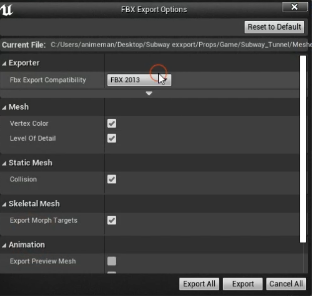
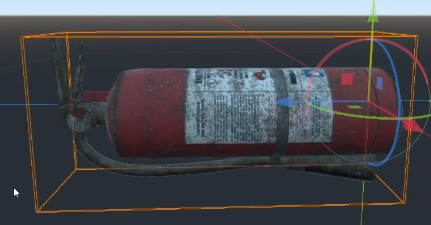
Once the project opens lets head over to the folder where the models are located. In my case its located in subway_tunnel/meshes/props. We are going to select our fire extinguisher. We are going to right click the model and click asset actions > export FBX.
Lets also export our textures. Go out to your texture folder and select your textures. Right click Assets actions > bulk export.
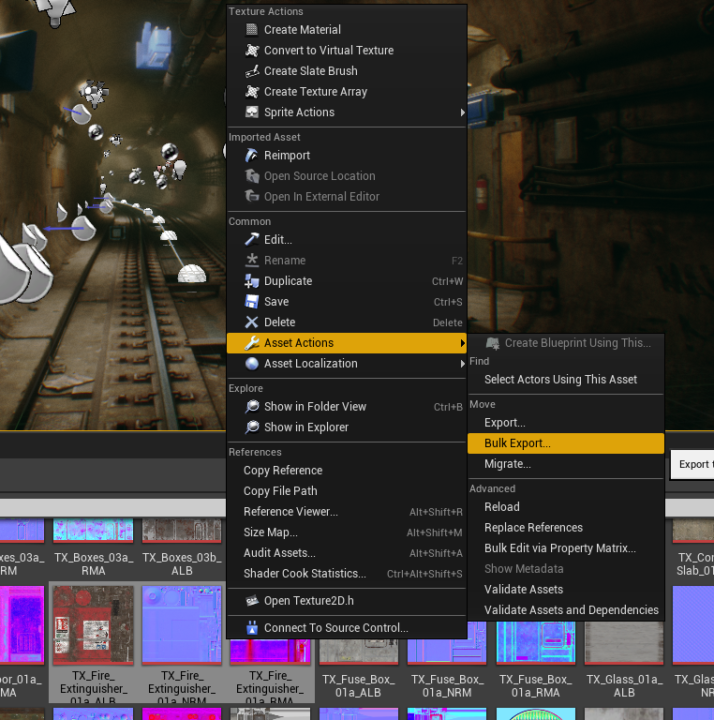
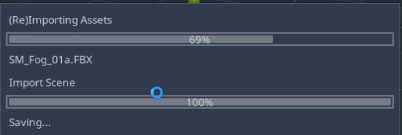
In my case I have exported everything. Using this method you can also export entire levels that are created in Unreal Engine.
Getting into Godot
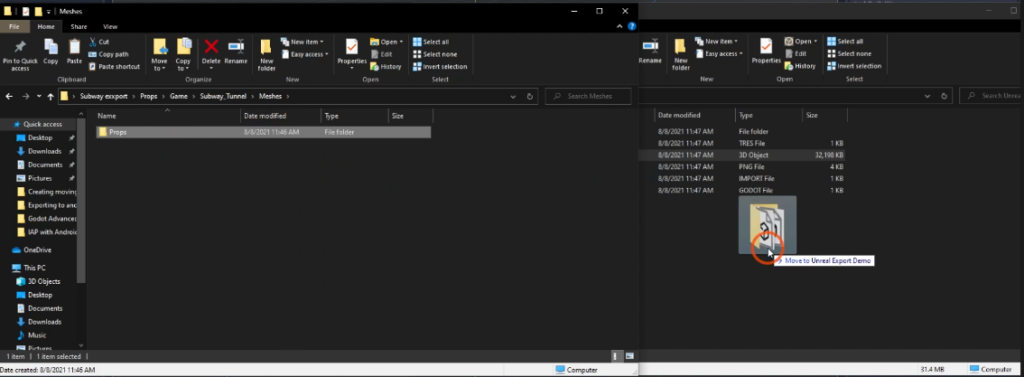
Now that we have our stuff exported we can go ahead and import them into Godot. So open up your Godot project and lets drag in our model and textures.
We are going to grab our entire props folder that was auto exported and drag it into Godot! From here once we click on Godot it will auto import all of the meshes we have exported.
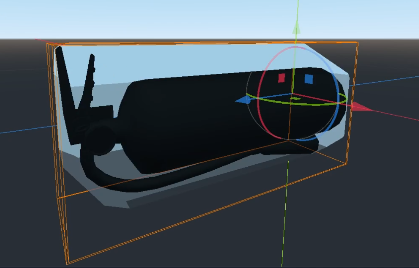
From here we have our assets imported into Godot. Lets go ahead and drag our FBX into our scene and you will see it appear into Godot! Now you will notice some things. All LODs will show up be sure to hide any collision meshes or LODs.

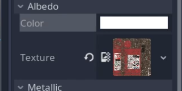
From here we will click on our material in our file system and get started assigning our textures
From here we will grab our albedo texture and put it in the albedo slot.

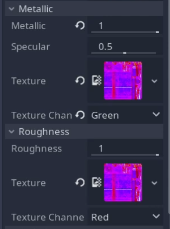
For the packed texture you will need to assign it to the roughness metallic and ambient occlusion.
When you use your packed textures you need to tell Godot with channel the texture is on. So in this case the texture is RMA, which means roughness(red) metallic(green) and AO (blue)

Godot will reimport every texture you assign so be prepared to wait.
Do the same for the normal texture.

Once its all been assigned you now have your unreal asset into Godot!
Conclusion
There you have it that’s about all it takes to import an unreal engine asset into Godot. Using this method I went ahead and used that subway map to create this render!
But thats all I have for you today so thank you so much for reading and ill see you next time!
Thanks,